My new Website!

Please also visit my newly "re-designed website" on http://www.veradesigns.com.au/

Monday, December 20, 2010

Cave Art Drawings


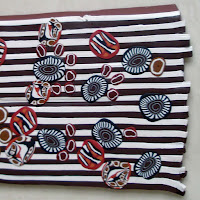
I thought I would take a little time out and work on a new idea for jewellery that I will teach at the High School next year.  Something that is easy to construct yet interesting and having an indigenous look and feel.


Polymer Clay focal in earthy colours. Carved shapes impressed with aluminum ribbon in various designs.  White acrylic paint applied with a match stick for that dot painting affect.  Gold rub and buff paint for highlights and shine.  Braided waxed linen cord.  Base metal beads and findings.


Saturday, December 18, 2010

Lot and lots of Lady Bugs

Here it is... the Lady bugs images that I promised.

An example of one of the pieces of jewellery that will be displayed at the Old Butter Factory Cafe, Bellingen... starting tomorrow.

Lady Bug necklace


Friday, December 17, 2010

Frances: "Ladybugs, Katherine. Lots and lots of ladybugs."

This is a memorable quote from one of my favourite movies "Under the Tuscan Sun".  I love this romantic comedy.  It's one of my all time favourites.  I can watch it a million times and never get tired of it.

At the moment I'm working on some jewellery for the "Old Butter Factory Cafe" in Bellingen where I'll be showcasing my Sculptural Art & Jewellery from Sunday the 19th of December.

So if you haven't finished your Christmas Shopping yet, please go have a stickie beak (check it out).

Some of the items will have these pretty little red lady bugs... "Lots and lots of ladybugs".

I will be posting pics of this "Ladybug Jewellery" over the weekend.

"Medicine Leaves" Polyclay Art on Canvas by Year 10 Students

Jess showing her Medicine Leaves Polyclay Art on Canvas

Click on Jess' Polyclay Art Canvas to view larger and see how it shimmers.

Polyclay Art created by Nambucca Heads High School Students in a class that I taught today.


Thursday, December 9, 2010

Leaves' Eyes - A Winter Poem lyrics


Polymer Clay Leaf and Feather Canes that I have been working today.  I love it when my art has a feeling of movement.  I feel like the leaves are alive and flowing out from a living organism.  Perhaps even from mother nature's infinite well of knowledge.

I think that the image goes quite well with the song.  Click on the YouTube link below to hear the music to the words.


Leaves' Eyes - A Winter Poem lyrics
 One million crystals on the outside of my window
One single thought, a thought of missing you
But only one word from within me
Describes the thought without of you

Ice feathers on my window
Reveal a single thought
A painting of your eyes
Is a sign that you do know

One million crystals
Not enough to page your beauty
Beauty of your soul
300 days I counted
Almost a year,
A mere of missing you

Ice feathers on my window
Reveal a single thought
A painting of your eyes
Is a sign that you do know

Once again waters change
Winter spell comes to life again

Ice feathers on my window
Reveal a single thought
A painting of your eyes
Is a sign that you do know

Ice crystals on my window
Hide frozen life inside
Ice storm outside these walls
But I feel my heart is warm

Saturday, November 27, 2010

Faux Ceramics

Here are pics of the Faux Ceramic beads that I taught Virginia how to make today with Kato Clear Medium and Alcohol Inks.  The base bead is a mixture of White Premo Clay, a bit of beige and a lot of beach sand.  The beach sand came from the Nambucca Heads Beach.  Adding the sand gives the clay just the right look.  All of these beads are Virginia's except for the little spotted fish at the bottom right hand corner. She's going to give these a couple more coats of Magic Glos at home.

There just wasn't enough time in the day to finish all the tiles.  These ones are partially finished.  Virginia decided to take these ones home to finish.  I'm sure that however she finishes them will be fantastic.  She has a wonderful eye for colour and design as you can see from the bottom three images.
These are a couple cheese knife handles that Virgina covered with polymer clay cane slices.  They're very popular in the Craft Shop where she sells them in South West Rocks.  She just can't keep up with the demand at the moment.  The shop's wanting more of 'em.  I can understand why!


Notice the little grey bags that the knives are set upon.  Virginia made those herself with some leftover felt that she had from when she was felting.  What a fabulous case to put them in after using and putting away.  Great protection from getting nicked.

Friday, November 19, 2010

Gifted and Talented Year 9 Students

A few pics from the two-day class that I taught at a local high school to Gifted and Talented Year 9 students as part of a Literacy and Numeracy Project at the Trade School.


Year 9 Students creating art


Polymer Clay beads created on Day 2


Proudly showing off their creative talent


Pendants the Year 9 students created on Day 1 and some of their Polymer Clay Art on Canvas


Stevo putting some details into his Polyclay Story


Adrian proudly showing his necklace and bush tucker bracelet. Click on image to see  his amazing colour combinations and details.


Tuesday, November 16, 2010

Steel wire-working class


Jim Hood hard at work learning some new wireworking techniques at my home studio.


Sawing jump rings from 14 gauge rebar wire with the jeweller's saw.  Di (wife) was very pleased with the bracelet that Jim gifted her at the end of the day.  It's the perfect size since she came for a nice relaxed day in the country and spent the day away browsing my library of extensive jewellery construction and design books.

Jim and Di have been creating some gorgeous Steampunk Jewellery and they plan on including some of this wire-work into some of their future designs.  It's really amazing what you have been upto... I know that we'll be seeing some of it at the next Nexus Gallery Members' Exhibition in Bellingen (Dec 19 - Jan 14).

Saturday, November 13, 2010

It's a very sad day for Megan Diaz and our Family

I woke up this morning thinking about my cousin Megan Diaz, who lives with her parents in Texas, and then found an email from my aunt with further news about her condition. See past post on Megan Diaz here, here and here.

My Aunt wrote that my 19 year old cousin, Megan Diaz, who was diagnosed with breast cancer, this year, has not improved. The doctors have recently informed her parents that the disease has advanced and that there is no other way.  They will have to remove both her breasts. The operation occurs in two stages.  One breast at a time.  As you can image... this is extremely traumatic for my Uncle; very difficult in fact as he was brought to sobs and tears when he informed my grandmother about the doctors' conclusion. Our prayers are with Megan at this time.

For information about breast cancer or if you would like to talk to someone, please call the Cancer Council Helpline on 13 11 20.

Please click here for the "Be Breast Aware" link of Australia.

Monday, November 8, 2010

Disaster... gonna leave Steel Clay for a while

I'm afraid that firing the new Pearl Steel Gray Clay in my kiln just isn't in the cards for me. I'm so disappointed with my own results that I've decided to leave it for a while... after three failed attempts. I'll wait until there is more development in the way of a firing schedule in a mini kiln box. It's a new clay... I'll let others lead the way into this new frontier.

I've lost patience with this clay and will stick with the one that I know best... PMC Silver. I've always had good results with PMC Silver. Although it's more expense... I have never been dissappointed with my results with that one. As you can see from my past creations here, here and here.
 
Thus... mini kiln boxes, steel clay powder, coconut carbon and ash sifter are now packed away in the shed for another day.  Hopefully, not too far in the future.

Saturday, November 6, 2010

It's here, it's here... my precious little mini kiln!

I found someone to carve out the Mini Kiln for me. I'm so excited that I can now fire my test samples tonight.  I'm keeping fingers crossed that the steel clay sinters competely. 


The photo on the right are my test pieces all lined up about 1/2 inch apart in Coconut Carbon, before covering completely.  I didn't spend a lot of time refining these pieces, they're just about the size and thickness that I will use if this works out.  Theyre squared cut pieces about 4 cards thick.  Will tell you about my firing schedule in another post.. I just want to make sure that it works right, first.  Read about and see the soft fire brick before it became a mini kiln.

Wednesday, November 3, 2010

I sanded the steel bracelet with a dremel today

It's been about 4 weeks since I made the Steel Clay and Viking Knitted bracelet. I wanted to see how long it would take for it to begin rusting without having been sealed. Has started to do so. Today I gave it a good clean with the dremel. It's nice and shiny now... has a pearl gray colour to it. I can see why they call it that now.

Here's a pic of it all cleaned up and sealed with Renaissance Wax

I just received my order of the Steel Clay and Coconut Carbon and will be test firing it in a couple of days.

I'll be posting pics of my results as well as the mini kiln when it's finished.
Check out the earlier posting about this bracelet here to see how it looked before sanding with the dremel tool and sealed with jeweller's wax.

Soft Fire Brick soon to be a "Mini Kiln"


I purchased this Soft Fire Brick after reading on Hadar Jacobson blog about "Mini Kilns, Even Better".  I'm gonna see if I can find someone that can carve it out to the right size for my kiln.

I've ordered some of Hadar's Pearl Gray Steel Clay from the Eclectic Studio and also a bag of  "Bronze Clay Carbon Firing Media - 750gr". This carbon is coconut based.

I will let you know how I go with finding someone to carve out the kiln brick for me.

Pretty Little Babies

Aren't they just too cute?!?!

They're like pretty little babies in the hospital nursery just waiting to go home with momma and daddy.

These are the offspring of the "Hope Bead" that I made for Megan's Fund Raiser.

My good friend, Pamela from Perth, said that she would off sell them for me to her Swimming Team. So they're now on the way to WA!  All boxed up in the gorgeous little pink boxes.

It's got that extra little decorative flair to easily attach to a cell phone, PDA, key ring, or other handheld device.

The decorative strap is attached with a jump ring and easily removed and added to a chain or beaded necklace.  And if you're game... you might handweave a Kumihimo necklace like the one that I made for Megan.

The proceeds from these beads are going to "Megan's Medical Expenses".  The cost is $20.00 plus postage.

Dots It Is!

And there you go. The Salad Serving Spoons with none other than "the Dots".  I'm quite happy with how they turned out.  I just think that the dots really set it off quite well.  Just that needed touch to finish off with the "Wow Factor" don't  you think?  It will be up to purchase online in the next few days, for those whom are interested. Other design patterns will be available for purchase soon... just in time for Christmas!
See previous blog post for images of this Fabric of Clay with and without "Dots".

Friday, October 29, 2010

To Dot or Not to Dot...???

Hmmm, that's a good question. 

This is a polymer clay sheet that I am currently working on.  I think of it more as a clay fabric, actually.

I have the most fabulous idea of just what to do with this fabric of clay! Stay tuned, watch this spot to see what's coming next.  I'm working on it right now and it will be ready for revealing really soon.
The base is a Fuchsia and Pearl Clay Layered Translucent Cane.  Lovely colours, I think.

But I am not sure if it needs more or if less is more.


So here it is again with a sheet of clear transparency plastic over the top of it with a few slices of a pink and white bulls-eye cane.  It's something that I just thought of trying before actually committing to it... as you know, once you place a slice of clay on top of an uncured sheet of clay it sticks. Not difficult to remove unless you've mooshed it in pretty good.
I think I'll go with the dots.  Seems like it needs it on this one, don't you think?

Thursday, October 28, 2010

Steel Clay!!!

 
What you say?  Steel Clay!!  Yep, that's right.  This man's bracelet is made of Steel Clay. 

What is Steel Clay? Click here to read all about it on Hadar Jacobson's website.

Believe me, it's not a clay like pottery or anything at all like that.  It's really steel!  In fact, I've actually caught myself on a magnet or two since wearing this bracelet.

I've just ordered 200 grams of it from the Eclectic Studio and can't wait to make more of these beauties.  I think that it's going to be a very good seller.

I learned how to make this at a class that I took recently at the Eclectic Studio in Sydney with visiting artist May Bartum from Queensland.  I also learned how to make the horse-shoe links in class.  I like this particular link because it reminds me of when I used to ride horses at my Grandparent's ranch in Texas so many years ago.

Copper Earrings using a Circle Cutter

Circles are common shapes in art jewelry. They are needed to make domes and they are often used to create charms. While it is easy to cut out a circle using a jewelry saw, a disc cutter (also called a punch and die set) will make the job faster and easier. I made this copper earrings using a Circle Cutter that I purchased on ebay.

Earrings Description: Hammered and domed copper discs. Black resin beads, non-tarnish artisan wire. Antique Copper Fish hook ear wires with ball and coil.

I sold this particular pair of earrings recently at the Infusions of Fine Art Cafe, Shop 3/105 Hyde Street, Bellingen, NSW. You'll find a showcase of my jewellery there. Phone 02 6655 0393. Open daily from 8am - 2pm. 

I really like having this tool.  Certainly makes it easy to cut out perfect circle discs everytime!

The cutter is made of a high-quality steel and cuts 5 different sized circles. When you receive your cutter it will be covered in a fine film of oil. This is to prevent rust. Do not rinse the cutter under water to remove the film as it will cause it to rust. Instead dampen a paper towel with hot water and wring out. Wipe the excess oil off of the cutter and dry completely. A fine residue of oil will remain. This is preferable since it will further protect the tool from rust.

View a demonstation of this wonderful tool on YouTube here.

Friday, September 10, 2010

Kumihimo is the Japanese word for braiding

Last week I posted an image and story about my cousin, Megan Diaz. As I wanted this necklace to be special... I took the time to braid these hand-dyed silk cords in contrasting colours. The Tulip End Caps are Silver plated with an extender and the bail is Sterling Silver. The braided necklace measures 45cm (19inches) and can be extended an additional 2.5 inches.  (Click on image to see larger).

I will be posting this lovely necklace to America very soon... just need to hold onto it a little longer as I promised Kathy Guerts that I would show it to her students in the class on "Striped Translucent Layering" and a "Flower Component Cane". The background in this bead is from the striped translucent layering technique that the students will be learning from me. I am teaching in Bowral, NSW.

Kumihimo: (kumi = to braid, himo = cord). It encompasses many types and shapes of braids done in many different methods with the aid of many different tools. Traditionally Kumihimo is done with dyed silk threads, although current Kumihimo braiders use everything from silk thread to metal wire.

Jen Tattam from Metal Clay Australasia stocks a fabulous beginner’s kit on her website.


You can create beautiful Kumihimo with the Kumihimo Loom which is the modern braiding disc. The notches provide the correct tension, so you don't need hanging weights. The cord winds up into the individual flexible bobbins, so you keep a compact workspace, but easily and quickly feed cord as you braid
 
This beginning kit includes:

KumiLoom: 15cm diameter, 12mm thick, the best Kumihimo disk available. Eight plastic cord bobbins (these are the well known EZ bobs).  A twelve page booklet of instructions for the basic round braid (both 8 and 16 strand), finishing instructions, colour pattern setup suggestions. Eight strands of practice cord, enough to get started (colours vary).

.
Karen DeSousa's book "Necklaces Braided on the Kumihimo Disk" is a must have with easy to follow instructions. Excellent fool proof diagrams. 10 great projects. If you have the Disk's this book is invaluable as a reference.  This book is being stocked at The Eclectic Studio. Karen DeSousa's book assumes you have never done it before and are willing to learn. Start with the beginner necklace and you will be ready for an intermediate level the next time.

Tuesday, August 31, 2010

There is "Hope" in my Garden

Back View
I recently learned on Facebook that my 19 year old cousin, Magen Diaz, is currently fighting stage 3 breast cancer and undergoing chemotherapy.   Magen's good friend, Ron Walker Jr, wrote on her wall: "She is one of 7% of the population that is diagnosed with this at an early age. Because she is so very young, the doctors said that this cancer is very aggressive and if it had occured in an older woman the cancer would have reacted differently and might be much easier to control."
Front View
My Aunt Eloisa wrote to me and asked if I would make a Heart necklace for a fund raiser on September 11th.  I immediately thought of the wonderful pink ribbon canes that Toni Ransfield, of New Zealand, makes and thought I could add them in the heart. Whilst looking through her etsy shop on http://www.etsy.com/shop/toninz, I couldn't help but purchase all the flowers and butterfly canes that are in this heart.  And what a surprise it was when I opened the package and found that Toni gifted me with this bumble bee canes.  I nearly forgot to meantion that she took the time to look through her stash of other canes for the Pink Ribbon cane (also a gift) when I didn't see it on her website.

The heart background is from the Striped Translucent Skinner Blend cane that I made today.  It's a cane that I will be teaching at Studio Amara on Saturday September 26• 10am till 4pm • Anglican Church Hall, Berrima • Cost $ 140.

More information about Toni Ransfield in the Spring 2009 Issue of the Coffs Coast Newletter.  See link at the right side bar.

Sunday, August 29, 2010

Student's work: Virginia Yelavic

These are images of Virginia, my student from South West Rocks, reducing a complex cane from 7cm wide to 1cm wide, to be used on a dark brown and white striped sheet with other cane slices.

Below is a pair of sugar spoons that she covered with one of the polymer clay sheets that she created today.

Close up of the cane apliqued sheet with dark brown and white stripes and Virgina reducing and pinching that complex cane some more.


Thursday, August 26, 2010

"All Hands In"


These are the hands of my high school students, of Aboriginal ancestry, whom I taught to make polymer clay braceletes with a "Bush Tucker" theme.

What a fantastic picture capturing some of the beautiful skin colours of  Australia's Indigenous nations.

In this class of Year 7 students, I taught them colour mixing, making canes, creating there own polyclay beads,  balanced jewellery designs, and constructing the bracelet using basic jewellery wire tools.

Can you make out which component reresents the "Honey Ant", "Emu morsel with Mountain Pepper" and the "Witchetty Grub"?


Saturday, August 21, 2010

All that Jazz

The Bellingen Jazz and Blues Festival is on this weekend (August 20-21-22) which began in 1990, provides three days of live music designed to present a cross section of jazz and blues styles performed by the best musicians available.The aim is to provide a program containing “something for everyone”.


Here's a peak into "What's News" at the Infusions of Food & Fine Art Cafe in Bellingen. These an samples of the polymer clay sculptural art jewellery now in the Showcase. Purchasing it as a gift... too easy, just ask for the gift packaging and the friendly staff will box it up ready for presenting.
The Infusions of Food & Fine Art is located at Shop 3/105 Hyde Street, Belligen, NSW.  Telephone 02 6655 0393.  Open for Breakfast and Lunch from 8am - 2pm daily.  Come check it out and peruse the other art currently on exhibition.

Wednesday, August 11, 2010

Polymer Clay art on canvas

"Bush Tucker"

I call this "Bush Tucker". The focal critters are Witchetty Grubs, which are a principal food source the Aboriginal women gather in Central Australia. The black line through the centre represents a trail of termite ants. Whilst the spirals with black and white are the termite mounds... saw them on my trip to the outback a few years ago. The dots are vegetation and other bush tucker.

This is one of the art projects that I'm teaching at a local High School to Aboriginal Students through a Literacy and Numercy program.

Mini Display Easel with Canvas that I purchased from the Bellingen News Agent. Canvas measures 6cm x 8cm.